Feeds:
Posts
Comments

Posts Tagged ‘How To’

This is a slide show I created last year and shows some of the seedlings that I started and grew and this reminds me I need to do the same for this year….  Slide show    Make sure to watch the original view and turn up your speakers!

Something that came to mind as I was looking back at my notes and pictures from last year was a simple reality that alot of folks are intimated by gardening and hesitate just because they have never gardened before and…… there is so much different information out there it can be confusing.  So I thought I would help by suggesting a few plants to grow for the first time gardener.  These were easy for me to grow and gave me inspiration and a desire to try other plants!  A few herbs that work well are Basil, Dill, Cilantro and Borage.  Marigold and Zinnia are great flowers to add to a border or include them in your garden as companion plants.  The vegetable plants I suggest are Spinach, Pepper, Tomato, Squash and Cucumber.

Dig up an area that receives a good amount of sunshine during the day and make sure to keep your new garden watered.  As you experiment with growing you will look into different varieties that interest you and those that  you enjoy cooking with.  You will also find yourself searching out more and more information on soil, preserving and techniques that you want to try.  Start out simple in the beginning …
Read Full Post »

From the title of this post it appears I am going backwards in time, back to the basics and … I am!  I have been researching grains to grow this season in my garden and I am surprised there isn’t more information out there, but then again our world has become so modernized that most folks don’t grow their own grains or need to make their own quilts to stay warm.  In reading up on quilting there was some history touched upon and Quilting Bees used to be the big social event!  Can you imagine??  Most everyone was busy working in some form, cutting logs, baking bread… survival – and the quilting bee was a time to gather and the women would sew and chat, and then there was dining and dancing – everyone dressed to the max for these events.  I would probably dig it, but I bet I am the only one in this family who would!  So although making a quilt looks like ALOT of work I am going to attempt to make one … I think it would be so neat and since I can’t be out gardening in this negative degree wintry weather, I might as well make something to keep us Warm!  I did post several facts about Growing Amaranth Grains on the forum under Grains and it appears to be an easy grain to grow.  I will be researching other grains and hope to grow them as well.  It seems our hard working ancestors have plenty to teach us about the basics in life and with the present state of our economy, I am betting many folks will benefit from this information.  I know I will be growing alot more food for my family this year, all my seeds are already ordered and my research continues! 

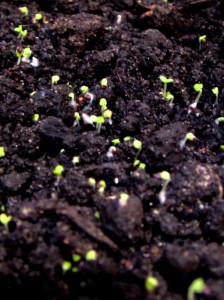
thyme-sprouts-2   Thyme seedlings I started a few days ago … along with the other herb seeds which are all sprouting up also!

Read Full Post »

My first luffa was fully dried and ready for peeling, so off came the outer skin to reveal the luffa sponge inside!

luffa-peeling-2

Here are the seeds that were inside this one – quite a bit!

luffa-seed-from-one-luffa Luffa seed

I worked on my first gourds and I designed a little swan … how perfect 🙂  I still need to make some feet or something so he can stand on his own.  The other larger gourd (bottle gourd) I decided to make into a vase so I cut the top off and transferred a pansy design onto it, then I woodburned it.  I will add more design and color and when it’s complete I will add it to my craft blog.   It looks pretty cool so far …

little-swan-gourd  woodburn-pansy

Read Full Post »

I have planted the garlic in the garden and I find this Very exciting!  Four different varieties and since I have only cooked with store bought garlic in the past, this should be quite the experience.  Yes, I will have to wait until July to harvest but that’s ok I can keep busy.

 not so straight, but that’s ok

I planted the cloves 6″ apart, 2″ deep and the rows are about a foot apart.  The hardneck garlic is a bigger clove and there are less of them to a bulb.  The softneck garlics have more cloves per bulb but are smaller and they are the garlic with the longer shelf life….most certainly, the type we buy at the grocery store.

  I covered the garlic with soil and a layer of compost and will also layer with 2-6″ of shredded leaves once they fall.  I harvested the last of the beets this week and found an excellent recipe.  Now I realize not all folks like beets, but I love them and I am the only one in the household who does … so lots of beets for me!  The recipe calls for 2 lbs of beets –

  Wash the dirt off the beets and cover with boiling water, cook until tender (30-60 mins. depending on the size of the beet).  Cool and remove the skin and stems and reserve 1 cup of the beet liquid (the water the beets were cooked in).  The recipe calls for 1/2 cup but there wasn’t enough liquid to cover the beets in the jar.  Cut up the beets and add to empty quart canning jar.  Then boil the following ingredients and pour over the beets – 1/2 cup apple cider vinegar, 3 tblspns of sugar, 1 garlic clove, 1/2 teas. salt, 3 peppercorns and 1/4 bay leaf and the saved beet liquid. The additional liquid may water down the flavor so more vinegar may be needed as well.  Put on the lid, let cool and refrigerate.  I figure these will be gone in about a week so no need to can them up for a longer period.  For all you beet lovers….they are SO good!  My helper Frankie was watching and waiting for one of those beets to bounce to the ground……no such luck Puppy Dog***

Read Full Post »

   Birdseed!!  This year I left the seed that had fallen from the birdfeeder alone and watched it grow into lovely plants.  Usually I pull the sprouts as they appear.   Just recently I cut the seed stalks and let them dry – I believe I have some millet and broom corn.  They are very sturdy and will work great for crafts!

Birdseed growing ….

I was working on some crafts last night and I came up with a great use for the Luffa Sponge (which I have to report is growing very well down south).

 I was worried with the lack of rain down there, but we received some rain and they took off!  I used luffa from last year as a base for dried flowers.  Instead of using glue and/or foam to secure the flowers in place, I used the Luffa and it worked perfectly!

 This is the start of the project.  You can see the completed arrangement at The Crafty Garden along with a few other finished pieces.  You will see three items which I purchased on Clearance at the local craft store.  I check for clearance bargains whenever I shop and find some great material … the straw hat I purchased for a dime each (I bought six), the little wooden birdhouse was a dollar each (I bought five) and the teak birdhouse was a bit over 2 dollars each (I bought three) – it’s a beautiful piece!  Make sure to check those Clearance aisles especially now with the change in season!


Read Full Post »

Yesterday I decided it was time to pull the corn stalks out of the garden. I was hoping for another harvest of corn from the second set of ears but I can see that is not going to happen – I did save a few mini corns and will let them dry and I may incorporate them into a fall craft. I am still waiting to see what the blue corn I planted is going to do. There are 4-5 small ears on a stalk … thing is – they ain’t Blue, so not sure if they need time to change color?

 Mini corns – blue on top

At the beginning of the season I let one of the first ears of corn dry – I left the kernels on the cob and after about 2 weeks they came right off. I will be saving these as seed for growing next year.

As I was pulling the corn stalks I noticed growing up along one of them was a strand of beans! I had planted 2 rows of beans alongside the corn according to the theory of growing corn, beans and squash together as companion plants. I thought the beans never germinated but I guess there was one strong survivor! So I left him growing on the corn stalk thinking I may keep those bean seeds to plant next year.


I am Very Happy to report that the spinach seed I saved earlier in the season has sprouted! I planted a few rows just recently for a fall crop and they are growing!! I will plant a few more where I had the corn and should be all set with spinach!

 Spinach growing from saved seed!!

Read Full Post »

Today I pulled the last of the spinach stalks that I had left in the ground with the seeds drying.  I am saving spinach seeds for the first time and thought I would elaborate on what I learned about saving the seed.  I did notice an interest in the picture of the Drying Seeds on my Veggie Blog and since that’s a photo blog there is no explanation.  I know that when I first decided to save the seed I searched the internet and didn’t find too much detailed information.  What had me confused was the first stalks to go to seed were small, very small and I remembered when I planted the spinach the seeds were much larger and dark.  So I searched and watched and waited.  I know one explanation I had read mentioned a female seed stalk and a male seed – so even though this made no sense I thought I would see what happened and sure enough … I did notice two totally different seeds developing on separate stalks. 

Here is the explanation I offer from my observations (I could be way off but at least this makes sense to me!)  The first stalks to go to seed were male and contained the pollen and this I did notice … ALOT of yellow dust when the stalks were moved.  The male seed was doing it’s job of spreading the pollen and when it reached the female stalk, seeds developed which were much larger and this is the seed I knew to be the one to plant in the future.  The drying of the seed I concluded has to take place while the stalks are still in the ground so they can complete their process.  I did pull a stalk and let it air dry in the house and it never turned dark like the others that remained in the ground.  I pulled many stalks today that had not finished the final drying but the cucumber vines needed the space and I have PLENTY of spinach seeds to plant.  Here are some pictures to help clarify what the seeds look like and I regret not having one of the male seed stalks which were present earlier in the season (hm, where did they go?)  I will have to watch them closer next year now that I think I know how the process works!!  If anyone has further knowledge on this subject of saving spinach seed, please comment.  It would be much appreciated!  Now to see if the saved seeds actually Grow … stay tuned

Next is the spinach seed I air dryed in the house and it remained green

Read Full Post »

The next few days here (Illinois) are suppose to reach the 90s so I have been working like crazy to weed everything before the heat hits and with all the rain we just had it’s been a huge task!  Weeds do pull out easily after rainy weather so I can’t complain too much!  I also decided to Divide a Rosemary plant that I received as a birthday gift from my sister.  I want to keep some here and take some down south to plant.  The rosemary I take down south I will be planting directly in the ground since I plan to start a herb garden and I am hoping the rosemary does well and grows into a nice bush. 

  I soaked the rosemary with water and then pulled from the pot and it sure was rootbound!  I first attempted to cut the root mass in half with scissors but had to resort to using a much sturdier garden tool to accomplish the cut.


And finally …….. Success!

I will add more dirt to the larger pot of rosemary that remains here and the other is headed down south this weekend.  I also decided to Dig for Treasure today … Black Gold!  Compost is a treasure indeed in the gardener’s world and most of us do get excited when it comes to Compost!  The compost bin we have set up in our yard has been there for years started by the previous owners and I have never taken from the bin – I just added to it for 10 years!  So today was a big moment as we removed a board and dug some black gold out …


  I bet this will sure add great nutrients to my gardens…… Yes!

Read Full Post »

I harvested my first somewhat successful batch of garlic July 9th and I was very lucky these grew … here is what I learned.  I planted garlic LAST spring (not this spring) and had no clue when to dig it up, so I more or less just forgot about it.  In the meantime, I purchased the book “Growing Great Garlic” by Ron L. Engeland and guess what …… Garlic should be planted in the Fall – not spring!  AND it needs to stay in the ground for 9 months before harvest!  So considering I am in Illinois I should be planting garlic in October and harvesting in July.  The reason I think I was confused with the planting time is because most stores sell garlic in early spring so I just figured that’s when it gets planted.  The few garlic that I just did harvest sent up tops and were growing along with the rest of the garden.  The tops did start to die down just recently so I decided to dig them up wondering what I would find.  July is harvest time I recalled and here is what I found!


I spotted a few cicadas in the new garden we dug up this year.  Last year was the year for the 17 year cicada to emerge in our area – we had very few, but other towns were swarmed.  Not sure if these newly emerged cicada are late bloomers or our area will get hit this year??


This is the shell they leave behind –

The Swan Family is doing very well and seem quite happy – they even acquired a new buddy … a Beautiful Blue Heron!

Read Full Post »

Each time I toss an empty laundry soap bottle in the recycle bin I wonder and wish I could use it for something meaningful and beneficial.  I am a huge fan of recycling and when I witness others with no concern (even family and friends) who don’t recycle …… I cringe!  So looking at these laundry soap bottles I can only image how many end up in the landfills … thousands!  My dilemma was the hard plastic and the spouts they make – simple scissors won’t make it through the plastic and rinsing with water is a major task with those spouts!  So for years I have added them to my recycle bin knowing there must be a use somewhere somehow for them!

Enter…….. my new Dremel Tool which I recently purchased –

  I am clueless how this fantastic tool works but I have been tabbing through the instructions and realized it can “Cut” plastic so I attached the cutting attachment and tried it out!


I cut around the top of the bottle and as I was working on this … laundry soap came spilling out with more left in the container.  This was always something I knew – all the soap I was just throwing away thinking the bottle was empty .. but knowing it wasn’t really.

   Well, there’s the finished project BUT it doesn’t work … the water pours out around the spout also.  I took that spout and hot glued it where it is, but it needs refinement.  I have to think about this … I can try cutting out a hole lower down and inserting the spout or I can forget about that spout and just make a V cutout for the water to flow out.  That spout is so perfect for a garden watering can – I just have to figure out how to make it work.  You can never have enough watering cans …… as any gardener knows!

Goodness knows where this Dremel tool will take me next … OH, and here’s a picture of Mrs. Cardinal in her nest warming those eggs!

Read Full Post »

Older Posts »